So I was thinking tonight as I was searching blogs and blogs for DIY artwork ideas and I thought to myself, why haven't I ever posted How-to's on my own DIY projects?? Well for one I am too lazy to take extravagant pictures of each and every step bc usually I am too excited to just get it started and done before my son wakes up from his nap. I can now appreciate the blogs I have seen called "nap time is my craft time" and "nap time is my favorite time" I get it now! So anyhow, a lot of my decor in my home is DIY so I will try to rethink the steps of my past projects and make a point to try to post one project per week.
Here goes:
So I stole this idea from a friend who also stole this idea from a local home decor store. The artist was selling an item very similar to this one for over $800.
It cost me:
$20 canvas which was 50% off at Michaels, I love their sales!
$2.50 old dictionaries from Good Will on clearance that day also
$5 for acrylic paint
TOTAL: $27.50
woohoo!!
I already had on hand foam paint brushes and glue.

To get started I started with a large canvas bc I wanted the size to be substantial for our LR. You can use whatever size you find fitting. I made two others for my mom and sister in diff sizes also.
I began by painting my entire canvas including the edges with a orange color called terra cotta. I ended up needing two of these from Michaels to ensure I got good coverage on my entire canvas.
Next I made a paisley template using a thick cardboard.
After that I sat for awhile and picked out words in the dictionary that meant something to us. For instance, I used LOVE, FAMILY, GOLDEN RETRIEVER, MOM, DAD you get the point. I placed my paisley template on top of the dictionary pages and traced the paisley and then cut out the shapes, I ended up using about 28 paisleys for my large canvas, but you do what you like, more or less.
The cool thing about buying an old recycled dictionary from the Good Will is that it was super old and the pages were thin like a bible. And the insert pages were this red wine colored ribbon textured paper. I ended up using those also by cutting out paisleys using the ribbon pages in the dictionary to add a POP of color. I really like that added touch. If your dictionary doesn't have that option you could always use cool scrap book paper in a pattern or design that you fancy.
So anyhoo, I then layed out my paisleys on my dried canvas in the design that I liked. I used a non yellowing glue to adhere the paisleys to the canvas in the design that I had layed out. Have fun with it lay then upside down and sideways. I ended up doing a sort of fan design up my canvas that thins out toward th top. But you can do whatever you like to make it your own. Viola!
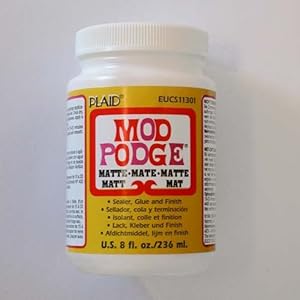
I suppose if you wanted you could add a layer of Mod Podge to the top to protect it, what is Modge Podge you ask? Well its my new favorite decopage.
Here are some more images of the DIY canvas art upclose and in my LR.
I think you will find my next project will involve my new found love of Mod Podge!! I got mine at Joann's, FYI Michaels did not have it!
So I was thinking tonight as I was searching blogs and blogs for DIY artwork ideas and I thought to myself, why haven't I ever posted How-to's on my own DIY projects?? Well for one I am too lazy to take extravagant pictures of each and every step bc usually I am too excited to just get it started and done before my son wakes up from his nap. I can now appreciate the blogs I have seen called "nap time is my craft time" and "nap time is my favorite time" I get it now! So anyhow, a lot of my decor in my home is DIY so I will try to rethink the steps of my past projects and make a point to try to post one project per week.
Here goes:
So I stole this idea from a friend who also stole this idea from a local home decor store. The artist was selling an item very similar to this one for over $800.
It cost me:
$20 canvas which was 50% off at Michaels, I love their sales!
$2.50 old dictionaries from Good Will on clearance that day also
$5 for acrylic paint
TOTAL: $27.50
woohoo!!
I already had on hand foam paint brushes and glue.
To get started I started with a large canvas bc I wanted the size to be substantial for our LR. You can use whatever size you find fitting. I made two others for my mom and sister in diff sizes also.
I began by painting my entire canvas including the edges with a orange color called terra cotta. I ended up needing two of these from Michaels to ensure I got good coverage on my entire canvas.
Next I made a paisley template using a thick cardboard.
After that I sat for awhile and picked out words in the dictionary that meant something to us. For instance, I used LOVE, FAMILY, GOLDEN RETRIEVER, MOM, DAD you get the point. I placed my paisley template on top of the dictionary pages and traced the paisley and then cut out the shapes, I ended up using about 28 paisleys for my large canvas, but you do what you like, more or less.
The cool thing about buying an old recycled dictionary from the Good Will is that it was super old and the pages were thin like a bible. And the insert pages were this red wine colored ribbon textured paper. I ended up using those also by cutting out paisleys using the ribbon pages in the dictionary to add a POP of color. I really like that added touch. If your dictionary doesn't have that option you could always use cool scrap book paper in a pattern or design that you fancy.
So anyhoo, I then layed out my paisleys on my dried canvas in the design that I liked. I used a non yellowing glue to adhere the paisleys to the canvas in the design that I had layed out. Have fun with it lay then upside down and sideways. I ended up doing a sort of fan design up my canvas that thins out toward th top. But you can do whatever you like to make it your own. Viola!
I suppose if you wanted you could add a layer of Mod Podge to the top to protect it, what is Modge Podge you ask? Well its my new favorite decopage.
Here are some more images of the DIY canvas art upclose and in my LR.
I think you will find my next project will involve my new found love of Mod Podge!! I got mine at Joann's, FYI Michaels did not have it!


